This Articles Contents
Introduction
In this module, we will cover Eclipse, or rather Spring STS Integration with Maven. All modern IDEs have Maven integration and can be configured using Maven. We’re going to cover installing Spring STS, which is actually just a flavor of Eclipse with some plugins and some nice things added into it.
Then we’re going to look at converting an existing project over to Maven to use Maven to configure the IDE. We’re going to look at importing projects that are also using Maven. Then we will look at the various features, including the POM Viewer and the Dependency Overview tool. Next we’ll look at how we can add a dependency in our IDE, and it makes things a little bit easier, as well as the dependency hierarchy, and how dependencies are resolved, including transitive dependencies. Lastly, we’ll look at the Effective POM, and what is your Effective POM inside your application?
Installation
Installation with Spring STS Suite and Eclipses very easy. It doesn’t use the registry, so there’s nothing really to install. We just download and unzip a bundle, and Java and Maven are installed the same way regardless of using the IDE. So I have to have Java installed, my JAVA_HOME variable set, and I have to have Maven installed.

Some IDEs do include a bundled version of Maven, and you can download Spring STS with a bundled version of Maven. I personally prefer to install it outside of it because it’s where it finds settings in that type of stuff from, I don’t want to have to configure it in multiple places. It can often be confusing and lead to errors down the road. To download spring STS, we’re just going to go to the URL spring.io/tools.
Demo: Installation
Getting Spring STS is actually quite easy. I’m just going to go ahead and open up our browser and go to spring.io/tools, and it will open up the main web page for the tool suite. It will detect which version of operating system you’re on. We’ll go ahead and choose Windows 64 bit and it will start downloading it. I’ve actually already got mine downloaded, so I’m going to cancel that and show you where I have it downloaded to my local OS.

You can see I have Spring STS tool suite right here. And if you open it up, it’s just a bundled .zip file. That’s all it is. I like to expand mine alongside my C dev tools Maven installation that we have, and you can see inside of here I’ve got a folder for Java, a folder for Maven, and a folder now for my Spring STS tool suite. So I’ve just gone ahead and expanded that over to here.
And if you open this up inside of here, there is the application launcher for SpringToolSuite4. So if I double‑click on this, it’s going to open up and launch the installation for it. It’ll also ask you if you want to choose a default workspace or which workspace you want to go to. To begin with, it’s going to have a much longer path. I chose C:\dev\workspace, and if you want, you can choose to have it use this as the default workspace and to not ask for that again. I like to have my dev tools and workspace all configured in that same space. You can choose to put it where you like, but I like having those combined together.
And then click Launch, and it’ll take it a second, it’ll launch the tool suite and come up to the main default workspace, and all of your tools will be available there for you to use.
Importing Projects
This is what our workspace looks like the first time we’ve opened it up and haven’t imported any projects into it. Now, you’ll see that there is an option to Import projects in the Package Explorer, and it’s stating to us that there are no projects currently in our workspace.

I’m not going to choose that one because that is only available the very first time that you use this workspace. Rather, I’m going to go up to File, and choose Import, and you’ll see Maven. We can expand that, and we’ll say Existing Maven Project. Choose that, and we’ll click Next. It’s going to scan our workspace for a minute and see which projects we have available for us, and we’ll click Browse.

And you can see the HelloWorld project that we’ve been using throughout this course. Let’s select that folder, and you’ll see that it now has identified our POM. So we just chose the folder, and it found the POM underneath that folder. Let’s click Finish, and now you’ll see that in the lower right‑hand section, it’s building our project this first time. So it will show you the success as it goes through and adds those dependencies, configures our classpath, those types of things.
Now that that’s done, we can go over here and expand our project and you’ll see that we have our src/main/java file, and it will tell you that this is a src folder. And below that is our default package, and you’ll see our HelloWorld Java file that’s actually residing underneath there. The other interesting thing is our Maven Dependencies folder. Now we have interacted a little bit with the IDE throughout this, but it wasn’t required for you to have that IDE installed. So to show you how this ties in, we can open up our POM file, and once it goes through and scans our POM file and builds the cache of all the dependencies and everything else we have inside there, we can start to look at our dependencies.
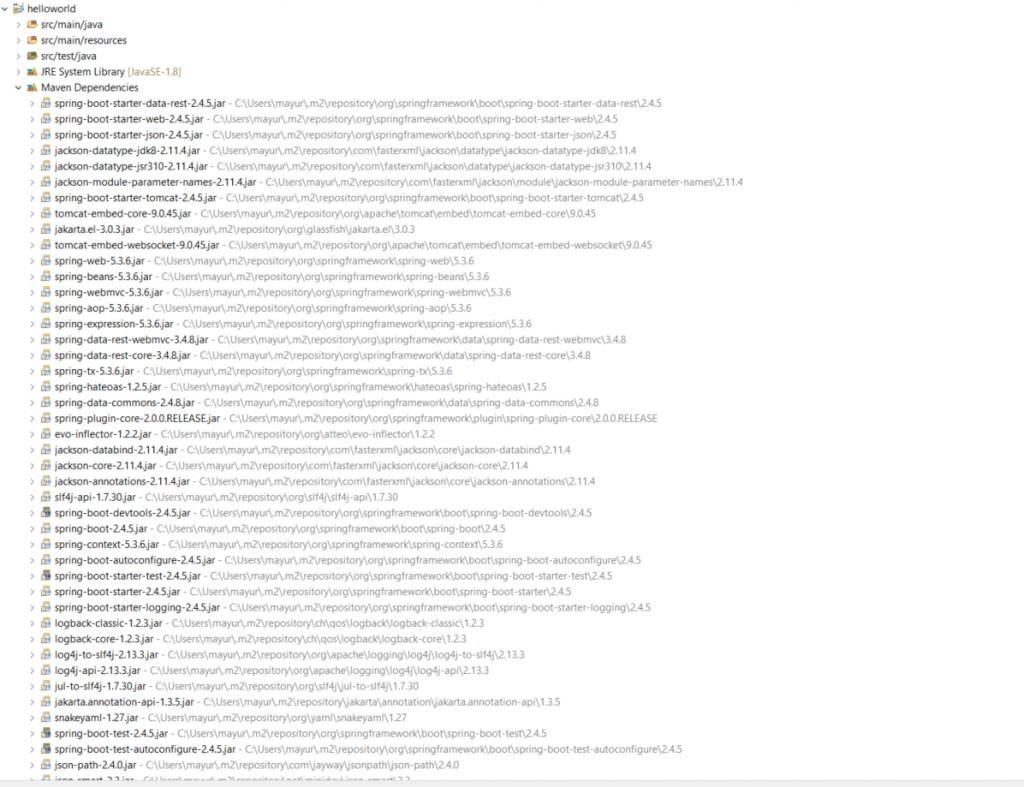
We have org.apache.commons, lang3. We have the jupiter, junit libraries inside of here. We have hibernate‑core. So we can go over here and expand our Maven Dependencies, and you can see that it has all of those JARs, plus the transitive dependencies associated with that. Let’s look at how those got pulled in.
Converting Existing Projects
Converting existing projects is just as easy as importing new Maven projects. If you have a POM file in your application, you can convert any Java project to a Maven project. If you don’t have a POM file, it’s really pretty easy to create one quite fast. You can right click on your project containing your POM file and go to configure and convert to Maven project, and it will give you a little fly out where you can specify that you want to convert it to a Maven project.
Once your project has been converted, the class path will automatically be set, and it will build the project and let you know of any errors that it may encounter or whether it built successfully or not. Let’s try this out with a sample project I’ve created now.
Demo: Converting Existing Projects
To convert an existing Java project over to be a Maven project inside of Spring STS, it’s actually quite easy. Before I dive into it though, I want you to look at the two icons associated with these projects. So I have this sample project Foo that I’ve created, that’s just a basic Java project, and then I have our HelloWorld project that we imported previously.
Notice the icon in the upper‑left hand corner of HelloWorld has a little m next to it, signifying that it is a Maven project. The Java project does not have that yet. Now to convert this, I have created a basic POM file inside of here, and I’ve added some simple information to it, our groupId, our artifactId, version, and then our packaging type. Now, our POM for our HelloWorld application has a lot more, but there’s nothing in our project Foo just yet.
So to convert this, I want to right click on it, and go to Configure, and Convert to Maven Project. You’re going to see that the progress bar down below goes through and downloads any dependencies that we need, and those types of things, and goes ahead and converts our project over to being a Maven project once it’s done building everything. Now that this is done though, there are a couple of things inside of here worth mentioning.
It’s now set the default as Java 1.5, which that’s not even a supportive environment anymore. And we have a target directory and a BIN directory hanging out here as well, and our src directory. So we probably ought to go ahead and do what we learned earlier with the build version, and open up our POM, and add a build section for the Compiler Plugin. So I’m going to go ahead and grab that build plugin plugin for the compiler.
I want to go ahead and open up our other POM, and add that section in there as well. Now I do need to close off our plugins element, and close off our build element, and save that. And now we want to go up to our project, and right‑click on it, and say Maven, Update Project, click OK, and you can see that it bumped up our build version to Java SE11. So now that we have that all compiling the way that we expect it to, it’ll act a little bit better for us.
Pom Viewer
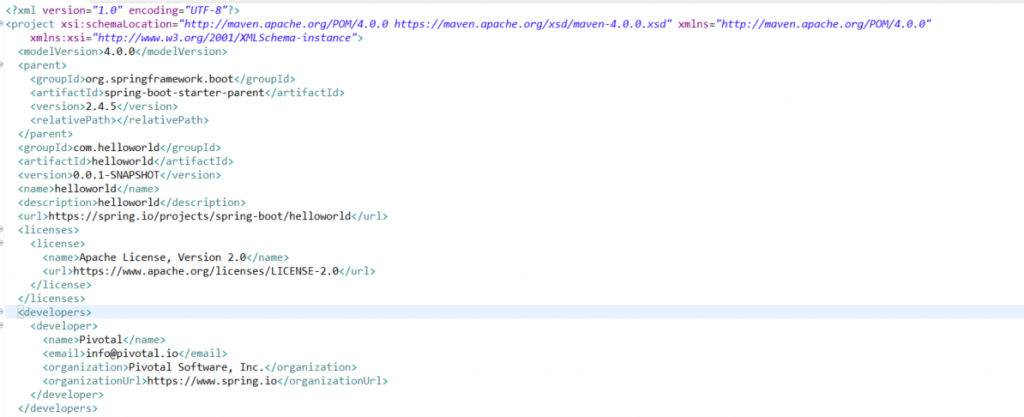
The POM Viewer is the default view when you open the POM file. It gives you a POM overview that shows you the high level elements of your project. Honestly, not super useful in the sense of what you can change, other than the name.
Most people will go directly to the source code because any changes made here are directly changing the source. The Overview screen is real, basic looking, and there’s things that you can change in here, such as naming convention, and packaging type, and that, but like I said, most people just generally do that in the source code anyway.
Demo: Pom Viewer
The POM overview is the initial view that you receive when you open up your pom.xml. I’ve opened this file up before, so it keeps wanting to go to the source code, but the first time you’ve opened up an application, it’s going to take you to this Overview screen where you can see the Group Id and the Artifact Id and basic meta information. There are some other pieces of this.
You can define project information, you can define your source control if you have this tied to your build process that it’s editing some of those things. Most people don’t use these other selections, though. It is of note if you change this here, so let’s say we take this from com.onurdesk to com.training and click the pom.xml, it will have changed our groupId here. And likewise, if we change this back to onurdesk and change back to our Overview, it will have updated that there. So it’s real time live editing of those features for you to go back and forth. Not super helpful, but it is nice if you don’t like meddling inside of XML.
Dependencies Viewer
Dependencies are actually more easily added in the IDE. In fact, this is one huge benefit to using your IDE. The Dependencies tab will show us which dependencies we have installed and allow us to manipulate those dependencies as well. The Dependency Management section that’s also on this tab is a more advanced topic, and it’s only used if you’re using a parent POM, which is definitely an advanced topic and something we’re not going to cover in this course.
The Add screen has searching capability, which we’re going to cover in a demo now, which really makes it a nice feature. We can just go ahead and type in any portion of it, and it will give us a drop‑down to which we can choose which version we want and have that added to our project for us.
Demo: Dependencies Viewer
The Dependencies viewer tab inside of your IDE is a lot easier way to add functionality to your project. So one of the tabs down below here is Dependencies, if we click on it and select Add, I can go to the search box here and just type in JUnit, for example. Now one downside is you do have to know which version of JUnit and which library you’re looking for.
I happen to know that we do want the JUnit Jupyter engine, but I can select that and click OK. Now if I click the pom.xml tab, you’ll see that it’s added a dependency section inside of my pom, and it has our artifact there. Likewise, I can go ahead and edit this, and hand key in a dependency. So let’s just add another dependency inside of here. We’ll give it a groupId of org.springframework, and an artifactId of spring‑core, and then we can give it a version.

You’re quickly seeing that this is a lot harder because I have to know all of this information. So we can say 5.1.2.RELEASE, and I’ll be totally honest with you, I had to remember if it was .RELEASE, or .FINAL, or how their naming conventions were to signify that this was the final version of this code while I was doing this example. So when I say this, it’ll go out and download any of those dependencies, but you can see over in my Maven Dependencies section now that I have spring core, spring jcl, junit jupyter, all of that stuff over here in my Maven Dependencies section. And if I switch back to my Dependencies tab, they both show up there.
Now one other really cool feature of this is that I can select that JUnit dependency that we added, and click Properties, and I can change the Scope. So one of things I wanted to do was only have that available as test scope, select test, and click. OK. I don’t have to go in there and remember the exact XML to have that configured to only be visible during test. So it’s a lot easier to manage those dependencies through that Dependencies tab, especially if you’re new to Maven, and adding those, and you don’t understand the XML very well, or you’re trying to look at which version of that library you want to select.
Dependency Hierarchy Viewer
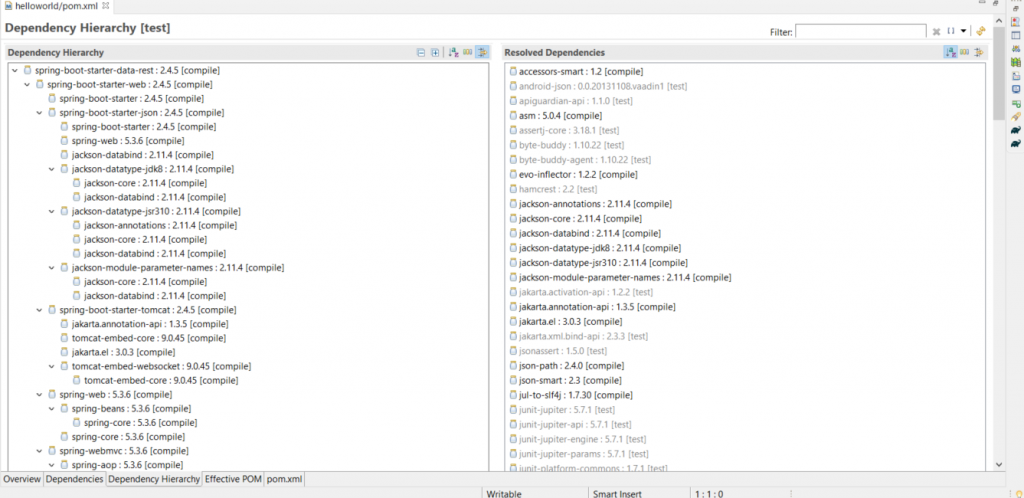
The Dependency Hierarchy view, I think, is one of the most important, if not the most beneficial view inside of our IDE. It will display the complete dependency tree, including transited dependencies, as well as overridden and any conflicted dependencies that we have inside of our application. The scope of our resource is also displayed.
The Dependency view in this example is very, very clean. There’s nothing major going on, but if we add a dependency like Hibernate has a lot of transitive dependencies, you’ll definitely see the benefit of using this view.
Demo: Dependency Hierarchy Viewer
We’ve seen how to add dependencies to our POM using the Dependencies tab. And you may have even clicked on the Dependency Hierarchy tab already, and you’ll see that with JUnit, there are some transitive dependencies that it’s pulling in, but we really only have one conflict you may have not even caught that that junit.platform.commons has a conflict with 1.0.2.
Let’s make this a little bit more interesting and come back to our Dependencies tab and click Add, and I’m going to enter in hibernate here. Now, one thing that I may have not mentioned to you earlier is that if you have not downloaded this before, it searches your local repo so it may not be available to you. So if I click on 5.4.1.Final[jar], and you don’t have that, it’s because you’re going to have to come up here and enter in the group ID of org.hibernate, the artifact ID of hibernate‑core, and the version of 5.4.1.Final, and that is proper case, so capital F and a lowercase i, n, a, l for Final.
Once you have that entered, or you have the option to click that in the search results, go ahead and click OK. You’ll have some progress of it downloading some things and adding that to your POM, but I’m going to show you a little mistake that people commonly make. If you notice the top of this tab, I have an asterisk next to *Foo/pom.xml. If I click on my Dependency Hierarchy tab right now, nothing shows up, and it’s because I haven’t saved my POM yet.

It won’t build that hierarchy for me until I save it, so you can hit Ctrl+S or you can come up and click the Save icon. And once I do that, you’ll notice it blows up my Dependency Hierarchy screen here, and you’ll see that we have a bunch of different things that it’s overridden or omitted. So my jboss‑logging, it’s told you that it’s updated for 3.3.2.Final because there was a older version of that in here. You’ll see that we had the activation API. There’s a bunch of little things that it’s overridden and omitted to a newer version, so really handy to determine what’s going on inside of your application.
Another useful feature, though, is if you’ve got a .jar inside of your application and you’re wondering where it came from, common problem, common concern with Java. In fact, a while ago it used to be that you would just have all of these .jars shoved in a live directory package inside of your application. But if you’re wondering, why do I need to have the jaxb‑api? You can click on that, and it’ll tell you exactly where it came through your hierarchy. So specifically, hibernate‑core wants the jaxb‑api, or you can click on jboss‑logging, that’s also from the core, jandex. So it’ll go through and allow you to determine where this library is coming from and who specifically is asking for it, FastInfoset, dom4j, byte‑buddy, antlr. Everything will tell you where it’s coming from and who’s pulling it in as a transitive dependency.
Effective Pom
The Effective POM can be a very wordy document. It is actually what our POM is underneath the hood of everything. It’s our complete POM with everything that’s inherited from our project POM. If we’re using a parent POM and the default super POM, so it’s three, possibly even four POM files combined into one.
It’s more of a debugging tool to see what the POM is doing and what versions of things we’re using. Not a lot of people spend much time in here, but it is important to know about because you can find specific things inside your application in the Effective POM. We’ll show a demo of it, and I’ll scroll through the whole Effective POM, and you’ll see that it’s quite wordy and lengthy, but it is important to know what’s going on inside of there, and that is an available tool to help you troubleshoot things inside of your application.
Demo: Effective Pom
If we look at the POM for our sample project right now, it’s really quite simple. We open it up to a full screen, it barely takes up the entire full screen. In fact, it only does because I’m on such a high resolution. We’ve got our three dependencies and our build section that defines which Compiler Plugin we’re going to use for a specific version. But if you look at the bottom of the screen here, we have the Effective POM tab.
If I click on it, you’ll notice that it is quite wordy. It’s very lengthy, and at first it looks very similar to what our POM is that we have to find just inside of our application. We got our model, group, artifact, and version information, then our dependency section, but as you scroll down, you’ll notice that we also have a repository section, and this is inheriting from these super POM. So it is pulling this information in from the super POM that comes with the Maven installation that we have. You can see that we have the main repository for Central Repo defined inside of here.

Same thing iif you scroll down to the PluginRepository section, you can see that we’re also going against the Central Repo for that, and it has snapshots also disabled for that, and it won’t try and force any updates. There is also, inside of our build section, the defaults for our source directory, test source directory, that type of information, where are outputs go. It has all of our information built inside of here.
You’ll also see that there’s plugins defined inside of here for us. So the release‑plugin, the dependency‑plugin, the assembly‑plugin, and you can see specific versions inside of here. So this is everything that’s being built inside of your application. Now you can override all of this just by editing your own POM, you don’t have to go into the super POM at all, but this is what’s configured for you by default. You can see our Compiler Plugin, how it adds that in line to the plugin section that we have. But then you can see where our test‑plugin’s configured at, and how all of that’s all ran, and the clean plugin, all of that information is pulled inside of our application.
We have the install plugin for all of those goals. We have the deploy‑plugin for the deploy goal and the deploy phase, the site information. All of this stuff is built out for you and inherited from that super POM, and if we were using a parent POM, it would pull that information in as well. So really wordy, a lot of stuff going on, but if you’re really trying to trouble shoot something, don’t look past the Effective POM tab because chances are you can find a version of what you’re looking for, or something that you might want to override, or just know how something’s working, and it’s defined inside of this file.
Summary
In this module we covered that the Maven integration with IDEs is a very valuable thing, and it can give us a lot of insight into what’s going on inside of our application. We also looked at the Eclipse and Spring STS installation and that it’s really just unzipping a bundled application.
Existing projects can be imported easily and converting projects can be done easily, as well. Adding dependencies inside the IDE is easier than doing it by hand, because there some good searching tools. Sometimes they don’t work as well as we would like them to, but they can make adding basic ones a lot easier. Solving dependency resolution errors is a lot more convenient inside the IDE as well, we can look and see if something’s being omitted or overridden.
And also configuring your IDE is just a lot more convenient with Maven on both of the demos that we did. As soon as we imported it, it automatically downloaded all those dependencies and added them to our class path and then built all of our source. It builds automatically based off of that configuration. So there’s no extra step to be done outside of your IDE or inside of your IDE to get it to work with Maven.